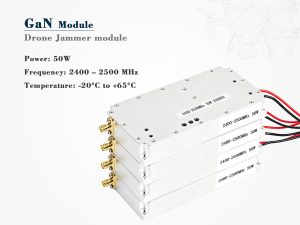
Looking at a datasheet for a drone jammer module can feel like drinking from a firehose. You get bombarded with numbers: 50W, 6dBi, 2km range, 0.2s response time. The problem? Not all of those numbers translate into real-world stopping power. If you’re designing a counter-UAV system or just trying to pick the right module off the shelf, these are the specs you need to decode — and the common pitfalls that come with them.

Frequency Bands: It Starts With the Right Channels
A jammer module can’t do much if it’s not targeting the frequencies the drone actually uses. Most commercial drones lean on ISM bands, but there’s nuance.
| Band | Typical Drone Use | What to Watch For |
|---|---|---|
| 433 MHz | Long-range telemetry, DIY crafts | Often skipped by cheap modules, leaving a backdoor |
| 915 MHz | US-market telemetry, some FPV control | Crucial for imported drones |
| 2.4 GHz | Main control + analog/digital video | Must be covered; almost universal |
| 5.8 GHz | HD FPV video, secondary control | Increasingly common for high-speed drones |
| 1.57 GHz | GPS L1 for positioning and auto-return | Disables autonomous flight; triggers ATTI mode or forced landing |
A module that only jams 2.4 GHz is nearly useless against a DJI drone that can hop to 5.8 GHz the moment it loses signal. Always cross-check the frequency list, and don’t forget the GPS L1 band if you want to prevent automated return-to-home.
RF Output Power vs. EIRP: The Distance Deception
This is where most beginners get tripped up. The “50W” stamped on the label is conducted power at the module’s RF port — not what actually radiates into the air. What matters is Effective Isotropic Radiated Power (EIRP), which factors in antenna gain and cable loss.
A 10W module paired with a 12dBi directional antenna might deliver higher EIRP in a narrow beam than a 50W module with a 3dBi omnidirectional stick. That means better range on paper, but only in one direction. In open-field, line-of-sight conditions, EIRP dictates how far you can reliably break the drone’s receiver threshold. Indoors or in urban canyons, multipath reflections eat up power quickly, so you need headroom. Don’t just ask “What’s the wattage?” — ask for the EIRP across all active bands, or be ready to do the math yourself.
Jamming Mode and Signal Type
The way a module generates its RF signal directly impacts effectiveness against frequency-hopping drones. There’s no one-size-fits-all mode.
| Jamming Mode | How It Works | Pros | Cons |
|---|---|---|---|
| Swept Frequency | Rapidly scans across a band | Covers wide ranges with moderate power | Can miss fast frequency-hopping signals |
| Single Spot / Tone | Fixed single frequency output | Maximum power concentration on one channel | Easily avoided by channel-switching drones |
| Broadband Noise | Barrage of noise across entire band | Hard to hop away from; effective against modern drones | High power consumption, significant heat |
| Smart / Protocol-Aware | Targets specific protocol weaknesses | Efficient, lower collateral interference | More complex, often proprietary |
For modern DIY FPV drones that use LoRa or frequency-hopping spread spectrum, a pure swept signal might fail. Wideband noise jamming is more brute-force but works. Check if the module allows you to switch modes or combine them — some high-end units let you allocate noise to 2.4 GHz while sweeping 5.8 GHz.
Antenna Gain and Beamwidth
Don’t treat antennas as an afterthought. Omnidirectional antennas are easy but spread power in all directions, reducing range. A directional panel or Yagi with 10-15dBi gain can push range past 1.5km, but with a narrow beam of maybe 30 degrees. For fixed-site perimeter protection, a mix of sector antennas often gives the best balance. The module’s specs should state what antenna impedance (usually 50 Ohm) and connector type (SMA/N-Type) it expects. Mismatching can damage the PA stage.
Duty Cycle, Cooling, and Power Supply
A drone jammer module that outputs 100W for 10 seconds then needs 5 minutes to cool down isn’t going to protect a airport runway. The datasheet should clearly state continuous transmit (100% duty cycle) capability. For continuous jamming above 30W, active fan cooling or a massive heatsink is mandatory — look at the thermal shutdown temperature. Also check the input voltage range. Portable setups often run on 24V battery packs, while fixed installations might use 48V PoE or AC-DC adapters. A module drawing 20A at 24V means you need serious battery capacity for more than a few minutes of operation.
Response Time and Integration Capability
If you’re linking the jammer to a radar or RF detector, the module needs a fast TTL or network trigger and low latency from trigger to full RF output. A response time of 0.1-0.5 seconds is typical. Anything over 1 second gives a fast drone time to breach the perimeter. IP-based modules with RESTful APIs allow you to adjust bands, power levels, and duty cycles remotely — a must for multi-sensor security networks.
Decoding the Datasheet Without Getting Burned
The bottom line: don’t let a single big number fool you. A drone jammer module’s worth is in the combination of frequency coverage, EIRP, mode flexibility, and thermal design. Next time you compare two modules, put them side by side on these five columns. The one that lets you fine-tune a wideband noise burst at 5.8 GHz while holding a 2.4 GHz sweep, all with a known EIRP and 100% duty cycle — that’s the one that actually stops drones. Everything else is just a warm box.